Up until recently, all three of our boys shared a bedroom. This was intentional for a couple of reasons. First, we wanted the boys to have time to bond. We 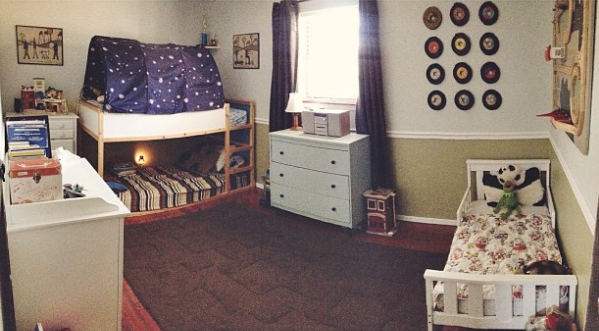 wanted them to have fond memories of giggling together late at night and building forts or reading together when they were supposed to be sleeping. We also wanted them to learn how to share. There is no better way to learn than by living in a small shared space and having to figure out in real-time how to make it work. Also, we really wanted to avoid the whole “No brothers allowed” attitude until it was absolutely necessary.
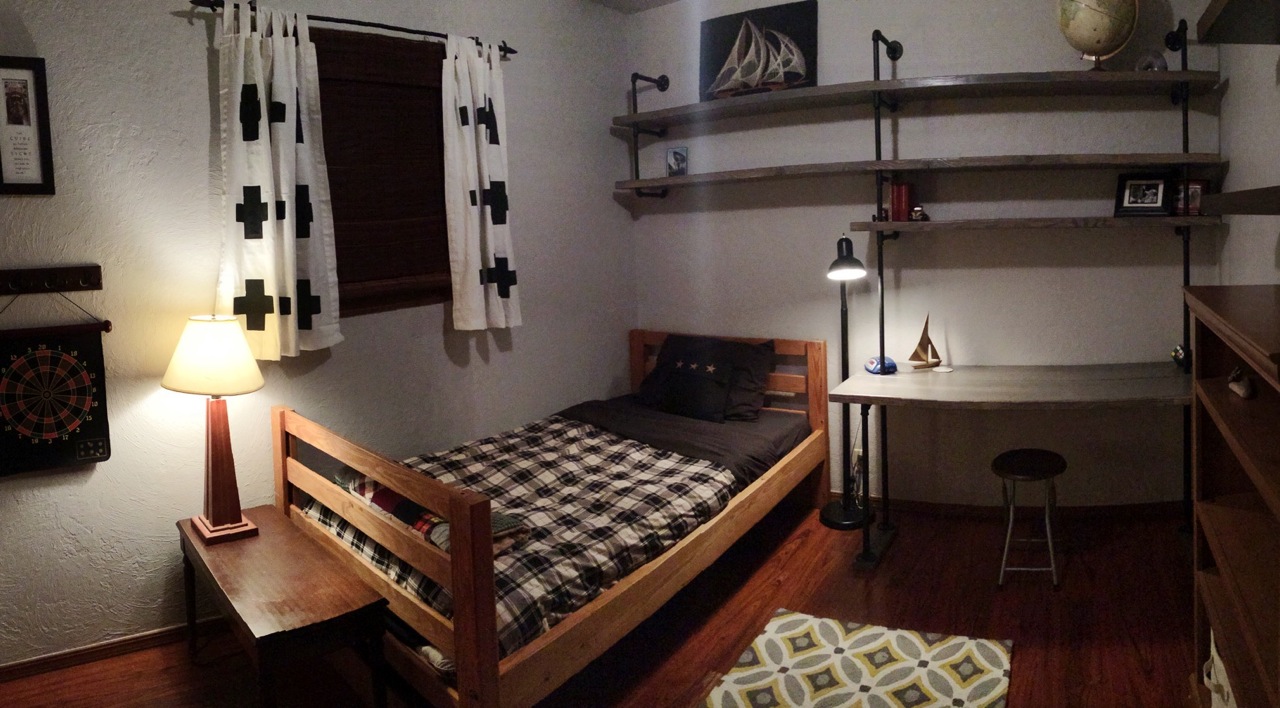
When our oldest boy, Ezra, started entering his tween years, we decided it was time for him to have his own space. We shifted my husband’s office to where the guest room had been and got to work. We were on a very tight budget, so everything had to cost next to nothing, but that’s what makes a project EXCITING in my opinion! Some friends gave us their old twin bed they didn’t need anymore, so all that was left to do was design a desk/shelving unit and add some knick-knacks.
We decided to keep it a secret and reveal it to Ezra as a birthday present. We closed the door to the room and told the boys they weren’t allowed to go in there because we were turning it into a guest room and there was a lot of stuff in there we didn’t want them getting into. My boys are not extremely interested in home renovation projects (ha!) so they never even had any interest in peeking inside. Is this a boy thing? If my mom had told me she was redecorating a room of the house, I would have been peeking in there every single day! My boys had zero percent interest in our sneaky-ninja project.
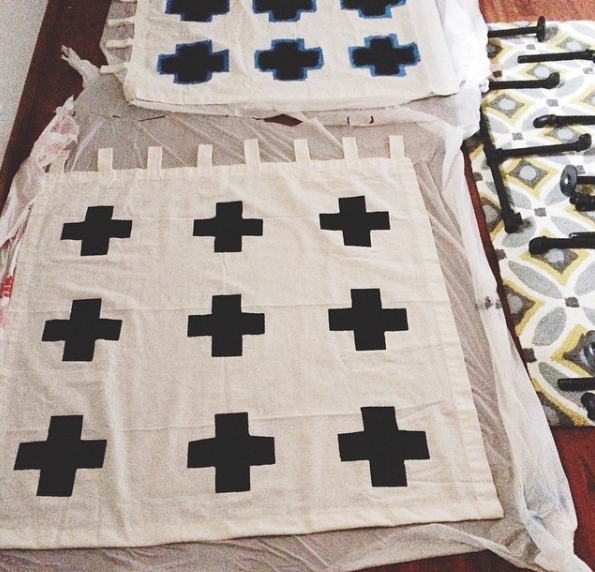 To keep to our budget, I decided to DIY some curtains for the room. I bought a pair of plain white curtains from a thrift store for two dollars. Then I used painters tape to create some cross shapes. I did not measure or use a ruler at all, I just “eyeballed” it. After that was done, I used some regular old black wall paint we had sitting around and filled in the crosses. After the paint dried, I removed the tape and voila! I imagine this would work well with any repeating pattern or stripes you wanted to spruce up some old curtains with- easy breezy!
Next, we had to tackle the shelving and desk situation. My handy husband measured the 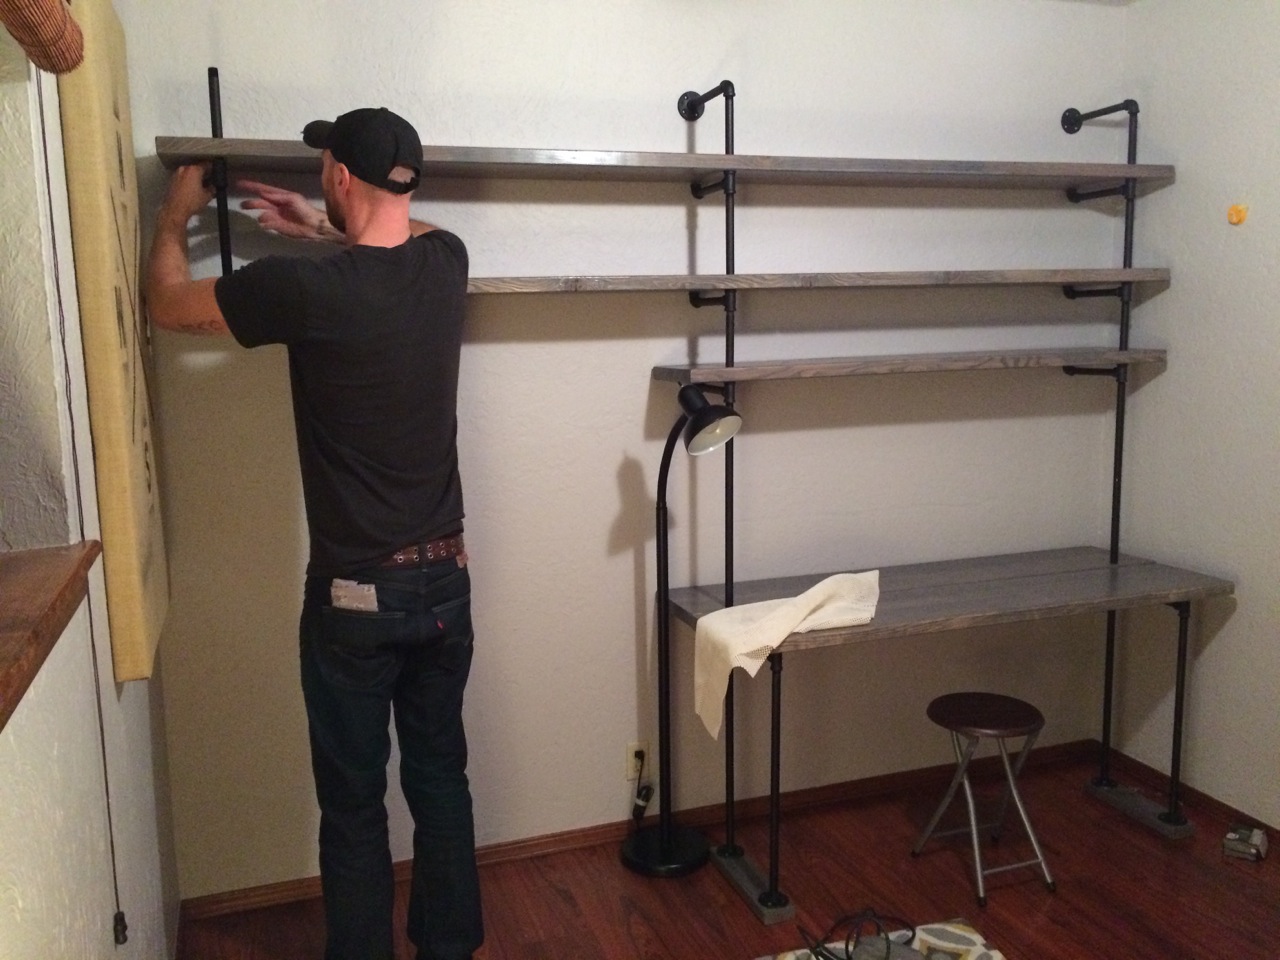 wall where we wanted it and sketched out a plan for a pipe and wood unit with plenty of space for Ezra’s billions of lego creations to live. The entire thing is made out of simple plumbing pipe and pine 2×6’s that we stained gray. It was inspired by the many awesome industrial shelving tutorials we found on Pinterest.
All that was left to do after that was move the furniture in and spruce it up with some knick-knacks! I found some lamps, a globe, and some nautical art and design elements at the thrift store. The rug and bedspread came from Ross.
All in all, the project cost around $250, and Ezra was completely thrilled with the result! Every available surface was covered in Legos in about two minutes flat. Oh, tweens.
I think his favorite part of the whole thing, however, was finally having a door to hang his ‘No Brothers Allowed’ sign on… OF COURSE.